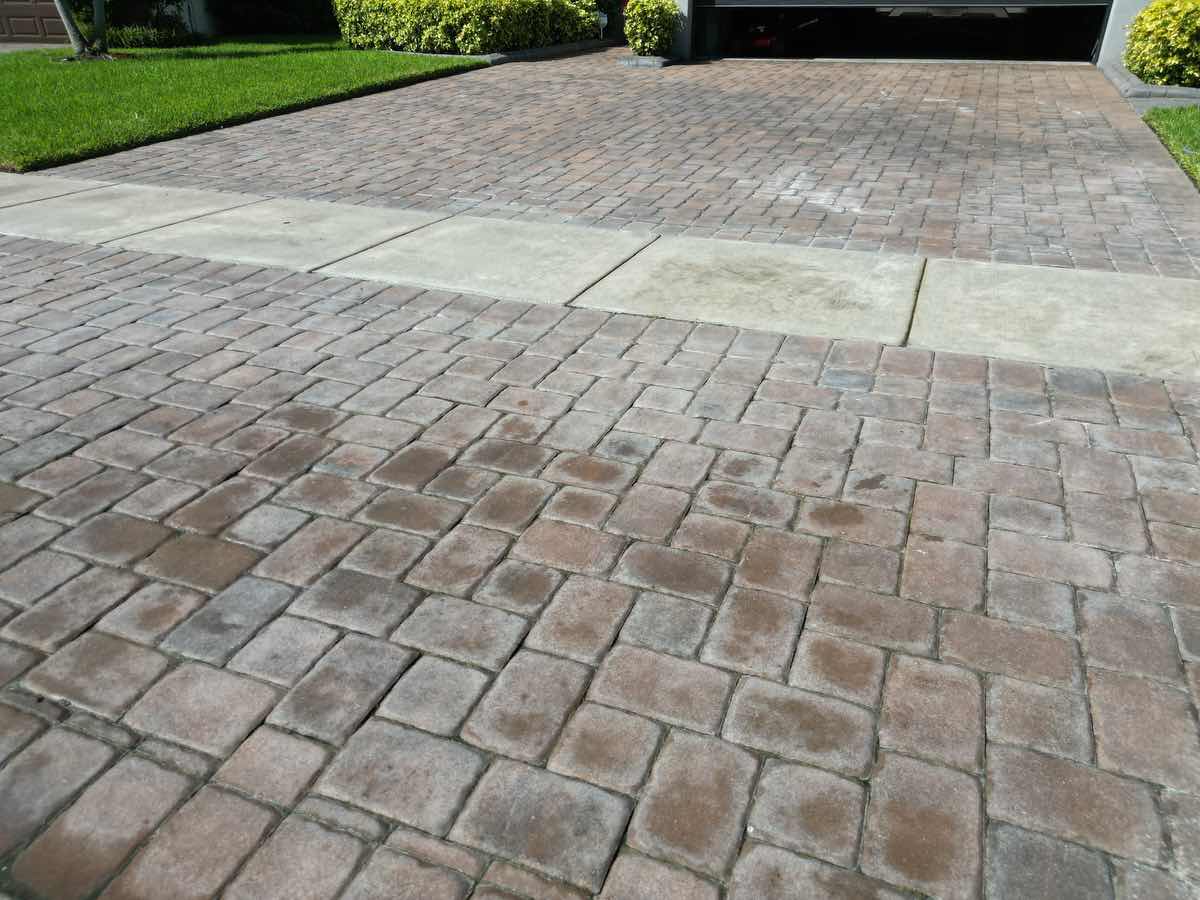
If you’ve invested in beautiful pavers for your driveway, pool deck, or patio in Port St Lucie, you already know how much they enhance your home’s curb appeal. But Florida’s intense sun, tropical storms, and high humidity can take a toll on even the most durable pavers. Without proper protection, you’ll start to notice fading, staining, weed growth between joints, and that frustrating white haze known as efflorescence.
That’s where professional paver sealing comes in. As trusted pressure washing and sealing experts in Port St Lucie, we’ve helped hundreds of homeowners protect their outdoor investments. The paver sealing process Port St Lucie residents rely on isn’t just about making pavers look good—it’s about extending their lifespan and making maintenance significantly easier.
In this guide, we’ll walk you through exactly what happens during a professional paver sealing service, so you know what to expect and why each step matters.
Why Paver Sealing Matters in Port St Lucie’s Climate
Before diving into the process itself, it’s worth understanding why sealing is especially critical for Florida homeowners. Port St Lucie’s climate presents unique challenges that accelerate paver deterioration:
UV Exposure: Our year-round sunshine is wonderful for enjoying outdoor spaces, but ultraviolet rays gradually fade paver colors, particularly in reds and earth tones. Unsealed pavers can lose their vibrant appearance within just a few years.
Heavy Rainfall and Humidity: Florida receives more rainfall than almost any other state. When water constantly penetrates unsealed pavers, it can cause erosion of the joint sand, create breeding grounds for mold and mildew, and lead to structural shifting over time.
Salt Air Considerations: For those closer to the coast, salt air compounds moisture problems and can accelerate surface degradation.
Organic Growth: Our warm, humid environment is perfect for algae, moss, and weed growth. Unsealed joints provide the ideal environment for roots to take hold and displace pavers.
A quality sealer acts as a protective barrier against all these issues while enhancing your pavers’ natural colors. Many homeowners notice that after sealing, their pavers look almost as vibrant as the day they were installed.
Step 1: Inspection and Preparation
The paver sealing process Port St Lucie professionals use always begins with a thorough inspection. This isn’t a step to skip—attempting to seal over existing problems will only lock those issues in place.
During inspection, we look for:
- Cracks or broken pavers that need replacement
- Sunken or uneven areas that indicate base problems
- Stains from rust, oil, organic matter, or efflorescence
- Missing or eroded joint sand
- Existing sealers that may need stripping
If your pavers have been previously sealed with a low-quality product or if the old sealer has failed, we may need to strip it completely before applying fresh sealer. This typically involves chemical strippers and additional cleaning time.
The preparation phase also includes clearing the area of furniture, potted plants, and any obstacles. We’ll also protect adjacent surfaces like painted walls, pool screens, and landscaping to prevent overspray or splashing during the cleaning phase.
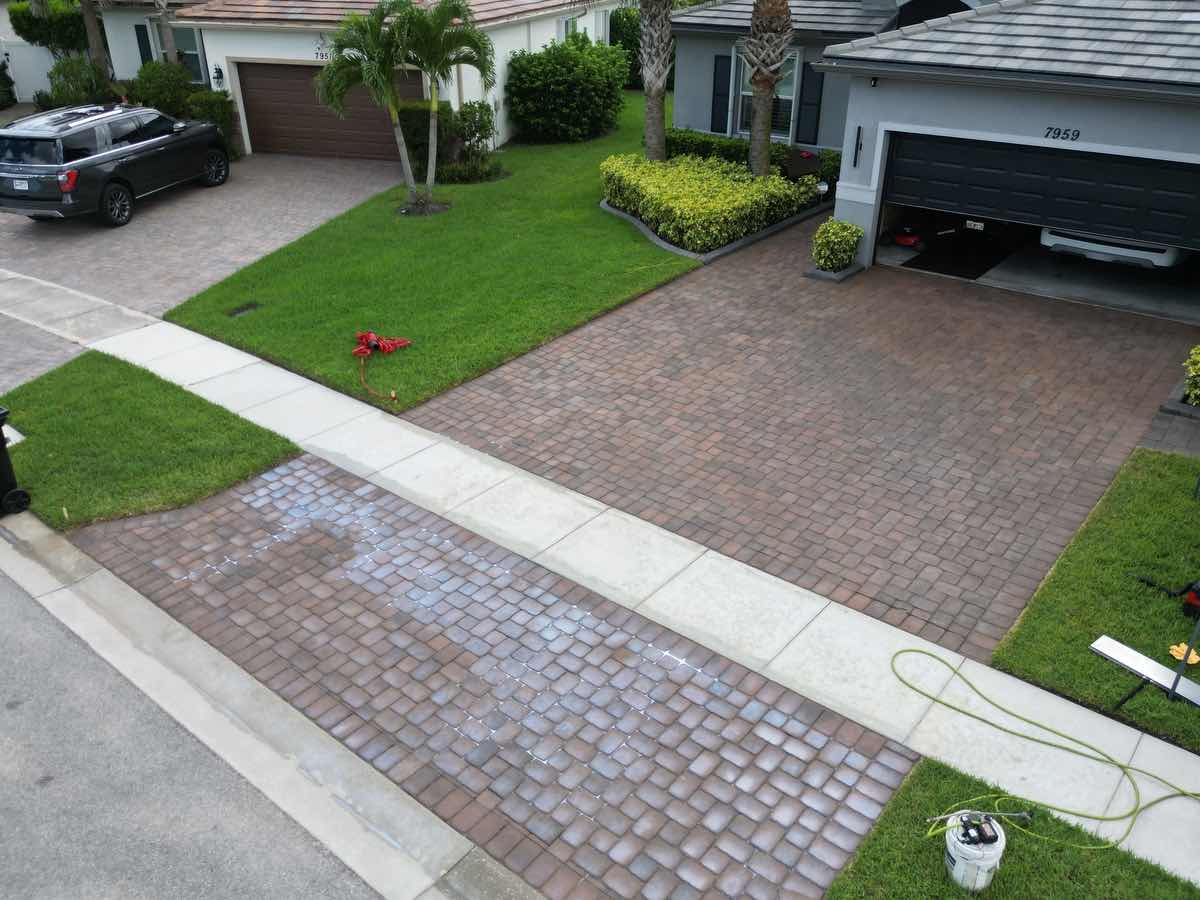
Step 2: Deep Cleaning Your Pavers
Here’s where the transformation really begins. No sealer—no matter how high-quality—will perform properly on dirty pavers. The cleaning phase is arguably the most important step in achieving long-lasting results.
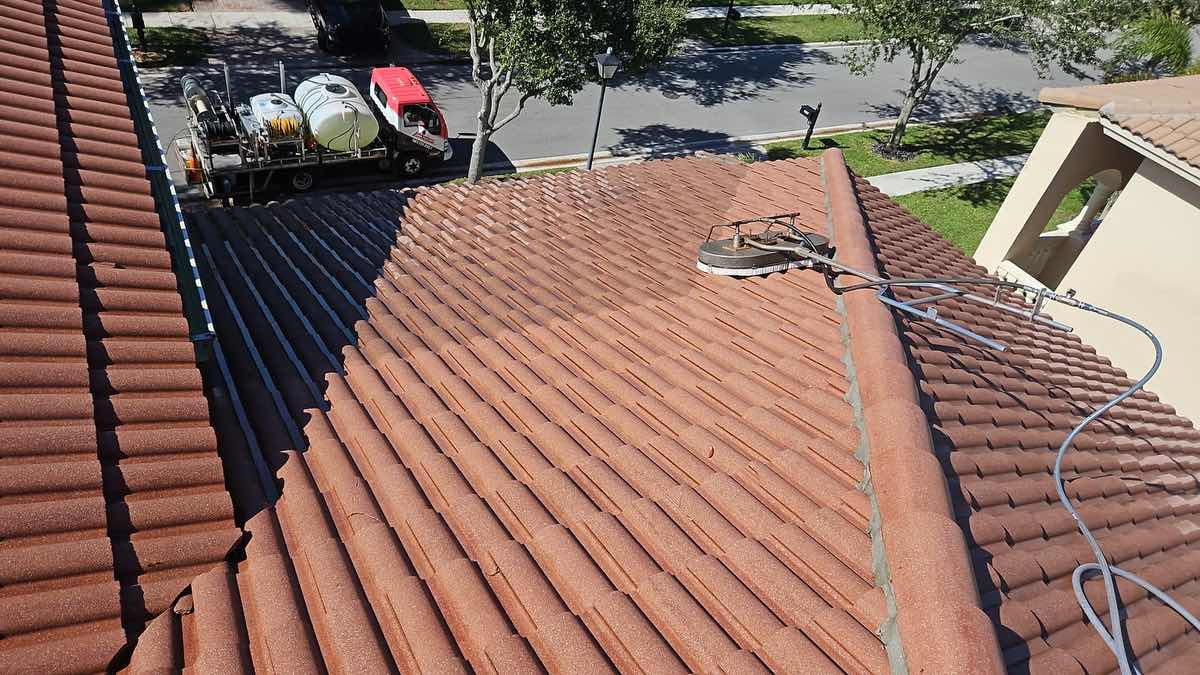
Professional paver sealing Port St Lucie companies use commercial-grade pressure washing equipment, typically operating at 3,000-4,000 PSI with specialized surface cleaners. This isn’t the same as a DIY rental unit—professional equipment provides consistent, thorough cleaning without damaging the paver surface.
The process includes:
Pressure Washing: We systematically clean every square inch of your paver surface, removing dirt, grime, mold, mildew, and organic growth. The surface cleaner attachment ensures even cleaning without the streaking that comes from wand-only cleaning.
Stain Treatment: Stubborn stains often require pre-treatment with specialized cleaners. Rust stains need acid-based cleaners, oil stains require degreasers, and efflorescence needs specific chemical treatment.
Joint Cleaning: Special attention goes to the joints between pavers. We remove old, contaminated sand and organic debris that’s accumulated over time. Clean joints are essential for proper sand installation and sealer penetration.
After cleaning, your pavers need adequate drying time—typically 24-48 hours depending on weather conditions. This is critical in Port St Lucie’s humid climate. Sealing over damp pavers traps moisture and leads to clouding, blushing, or delamination of the sealer. We often check moisture levels with specialized meters to ensure pavers are completely dry before proceeding.
Step 3: Repair and Sand Stabilization
Once your pavers are clean and dry, we address any structural issues identified during inspection. This might include:
Replacing Damaged Pavers: Cracked or broken pavers are removed and replaced with matching units. Finding exact matches can sometimes be challenging with older installations, but we work to source the closest possible replacements.
Re-Leveling: Sunken or uneven sections are lifted, the base is corrected, and pavers are re-set to proper levels. This prevents water pooling and ensures a smooth, safe surface.
Joint Sand Installation: This is a critical step that many DIY attempts get wrong. We use polymeric sand, which contains binding agents that harden when activated by water. This creates a stable joint that resists erosion, inhibits weed growth, and prevents insect intrusion (particularly important for keeping ants away from your patio).
The polymeric sand must be swept into joints completely, with excess brushed from paver surfaces before misting. When done correctly, it forms a solid, permeable joint that flexes with temperature changes while maintaining its integrity. One common issue we see in Port St Lucie is homeowners who’ve used regular play sand, which simply washes out during our frequent afternoon storms. Polymeric sand solves this problem.
After the sand is installed and misted, it needs to cure—usually 24-72 hours depending on the product and weather conditions. Rushing this step or sealing too soon can prevent proper curing and compromise the joint stability.
Step 4: Applying the Sealer
Now for the step you’ve been waiting for—actually applying the sealer. The type of sealer and application method significantly impact the final results.
Sealer Types: There are two main categories—water-based and solvent-based sealers. Water-based sealers are more environmentally friendly, have less odor, and dry faster—advantageous in humid climates. Solvent-based sealers typically provide deeper penetration and more dramatic color enhancement, but require more ventilation and drying time.
Within these categories, you’ll find varying levels of finish from natural (minimal enhancement) to high-gloss (dramatic color enhancement and shine). Most Port St Lucie homeowners prefer a semi-gloss or wet-look finish that enhances color without the slippery surface that high-gloss can create around pools.
Application Method: Professional application uses commercial-grade sprayers that ensure even coverage. The sealer is applied in thin, uniform coats—typically two coats with drying time between each.
We work methodically to avoid:
- Puddling: Excess sealer that doesn’t penetrate creates sticky, whitish areas
- Streaking: Uneven application that shows roller or spray marks
- Overspray: Getting sealer on walls, screens, or landscaping
The first coat penetrates and protects; the second coat enhances color and provides additional protection. In Florida’s harsh climate, we sometimes recommend a slightly heavier application for areas that receive intense sun or heavy foot traffic.
Temperature and humidity matter significantly during application. Ideal conditions are 50-90°F with low humidity and no rain forecasted for at least 24 hours. This can be challenging during Port St Lucie’s rainy season, which is why many homeowners schedule sealing during our drier months from October through April.
Step 5: Curing and Maintenance
After the sealer is applied, patience is essential. While the surface may feel dry to the touch within a few hours, full curing takes longer.
Curing Timeline:
- Foot Traffic: Usually safe after 4-6 hours
- Vehicle Traffic: Wait at least 24-48 hours for driveways
- Furniture Replacement: Best to wait 24 hours to avoid marking the surface
- Pool or Sprinkler Water Contact: Wait 48-72 hours for complete curing
One pattern we’ve noticed with Port St Lucie homeowners is the temptation to turn on irrigation systems too soon. Even though the surface appears dry, premature water exposure can cause clouding or white spots, especially with water-based sealers.
Maintenance Tips: Properly sealed pavers are significantly easier to maintain, but they still need care:
- Regular Cleaning: Sweep regularly and occasionally rinse with a garden hose to remove debris. Pressure washing can be done periodically, but use lower pressure (under 1,500 PSI) to avoid damaging the sealer.
- Spot Cleaning: Address spills promptly. Most sealed pavers resist staining, but acidic substances (like citrus or wine) and petroleum products should be cleaned quickly.
- Resealing Schedule: In Florida’s climate, we typically recommend resealing every 2-3 years for most residential applications. High-traffic areas or pool decks with chlorinated water may need more frequent attention.
- Watch for Signs: If you notice water is no longer beading on the surface, colors have faded, or the sealer looks worn in traffic patterns, it’s time to reseal.
Protecting Your Investment with Professional Care
The paver sealing process Port St Lucie homeowners need isn’t a quick afternoon project—it’s a multi-step process that requires professional equipment, quality materials, and expertise to do correctly. While DIY sealing is technically possible, we regularly see homeowners who’ve attempted it themselves only to deal with clouding, peeling, or uneven results that require professional correction.
The investment in professional sealing pays dividends through:
- Extended paver life: Sealed pavers can last decades longer than unsealed ones
- Easier maintenance: Weekly cleaning takes minutes instead of hours
- Enhanced property value: Beautiful outdoor spaces increase home appeal and value
- Cost savings: Preventing damage is far less expensive than replacing pavers
If you’re noticing your pavers have lost their luster, have stains that won’t come out, or if weeds are taking over your joints, it’s time to consider professional sealing.
Ready to protect and beautify your pavers? Pressure Perfection has helped countless Port St Lucie homeowners restore their outdoor spaces to like-new condition. You can request your free estimate online, or see our Google reviews to learn what your neighbors have experienced. Our team will assess your specific situation, answer all your questions, and provide a detailed plan to restore and protect your pavers for years to come.
Don’t wait until damage becomes extensive—proactive sealing is always more cost-effective than reactive repairs. Let’s keep your outdoor spaces looking their best through every Florida season.